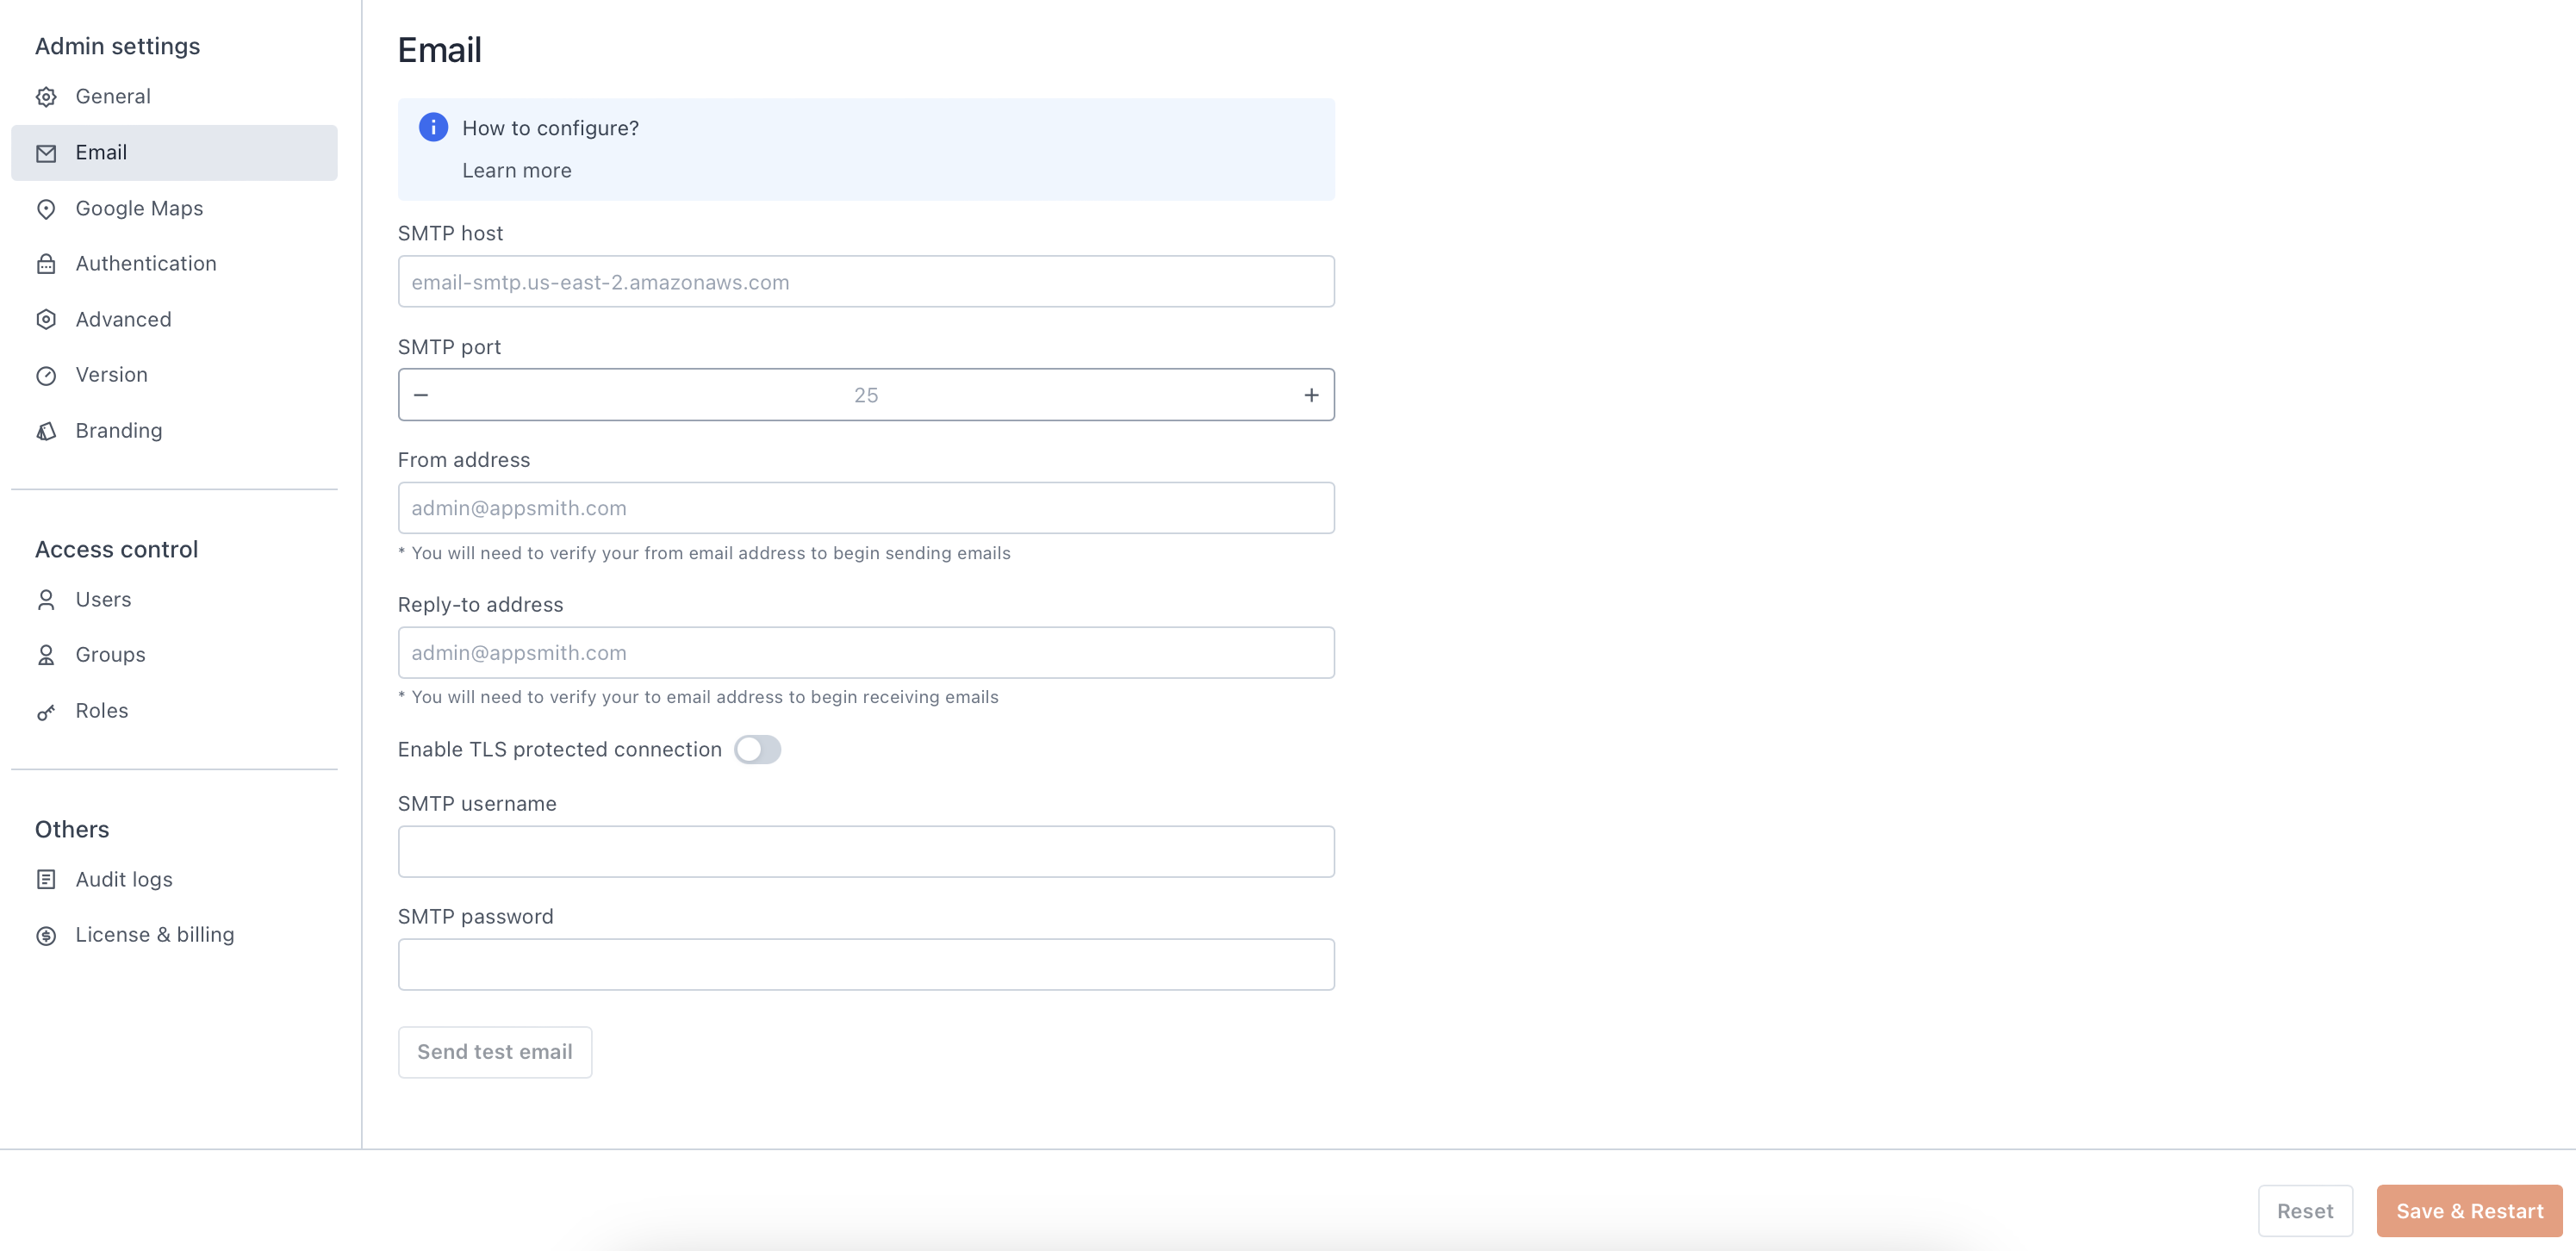
This page guides you through configuring an email service provider on your self-hosted instance. By configuring email, you can leverage the below capabilities:
- Invite users to join your Appsmith workspace by sending email invitations.
- Reset password using password reset emails.
Prerequisites
- A self-hosted Appsmith instance. See the installation guides for installing Appsmith.
- Account with your email provider.
Configure email
On Appsmith, you can configure email by using one of the following ways:
Admin settings
If you have configured email using environment variables for your instance, it takes precedence over the configuration provided through the Admin Settings UI.
Follow these steps to configure your email provider using Admin Settings:
-
Log into your Appsmith instance as a superuser.
-
Go to the Admin Settings screen.
-
Select Email from the left nav bar.

-
Add the configuration details for your email provider as below:
- SMTP host
- Add the SMTP host of your email service provider.
- SMTP port
- Add the SMTP port of your email service provider.
- From address
- Add a verified email address to be shown in the From field when users receive an email.
- Reply-to address
- Add a verified email address, so users can contact you.
- Enable TLS protected connection
- This option is turned off by default. Toggle it to enable the transport layer security protocol.
- SMTP username
- Add the username for your email service provider. This is only needed when TLS is turned on.
- SMTP password
- Add the password for your email service provider. This is only needed when TLS is turned on.
-
Click the SEND TEST EMAIL button to verify the configuration. A toast message appears at the top of the page, indicating the success or failure of the test. Additionally, a test email is sent to your inbox on successful verification.
-
Click the SAVE & RESTART button to save the configurations and restart the instance with the updated settings.
Environment variables
Follow these steps to configure your email provider using environment variables:
-
Go to your Appsmith instance configuration file. For example, the
docker.envfile for Docker and thevalues.yamlfile for Kubernetes. -
Update the values of the environment variables as shown below:
- APPSMITH_MAIL_ENABLED
- Set it to
trueto enable the email service. - APPSMITH_MAIL_FROM
- Set it to the verified email of the sender.
- APPSMITH_REPLY_TO
- Set it to the email that should receive replies by default.
- APPSMITH_MAIL_HOST
- Set it to the SMTP Host of the email service provider.
- APPSMITH_MAIL_PORT
- Set it to the SMTP port of the email service provider.
- APPSMITH_MAIL_SMTP_TLS_ENABLED
Set it to
trueto enable transport layer security.- APPSMITH_MAIL_SMTP_AUTH
- Set it to
trueto share theAPPSMITH_MAIL_USERNAMEandAPPSMITH_MAIL_PASSWORDwith the SMTP server. - APPSMITH_MAIL_USERNAME
- Set it to the username for accessing the SMTP service provider. This is only needed when the transport layer security protocol is turned on.
- APPSMITH_MAIL_PASSWORD
- Set it to the password for the SMTP user. Alternatively, you can use the API key generated by the email service provider for the SMTP user. This is only needed when the transport layer security protocol is turned on.
-
Save the changes and restart the Appsmith instance.
Troubleshooting
You may encounter some common errors after configuring your email provider:
If you continue to face issues, contact the support team using the chat widget at the bottom right of this page.
See also
To configure email with popular email service providers, see the guides below: